Unity- Experimenting (Terrain, Main Light, Texture, trees)


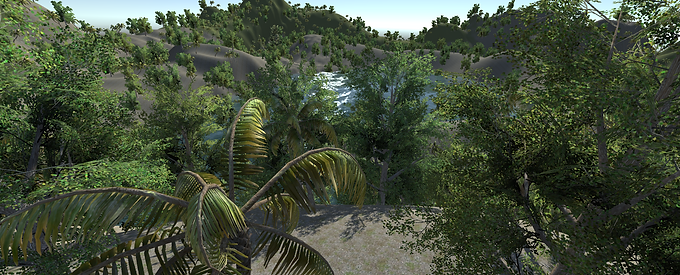


Unity- Importing Assets, Colour of main light, fog effect, Assest colour, Spot light)


Materials and Particles
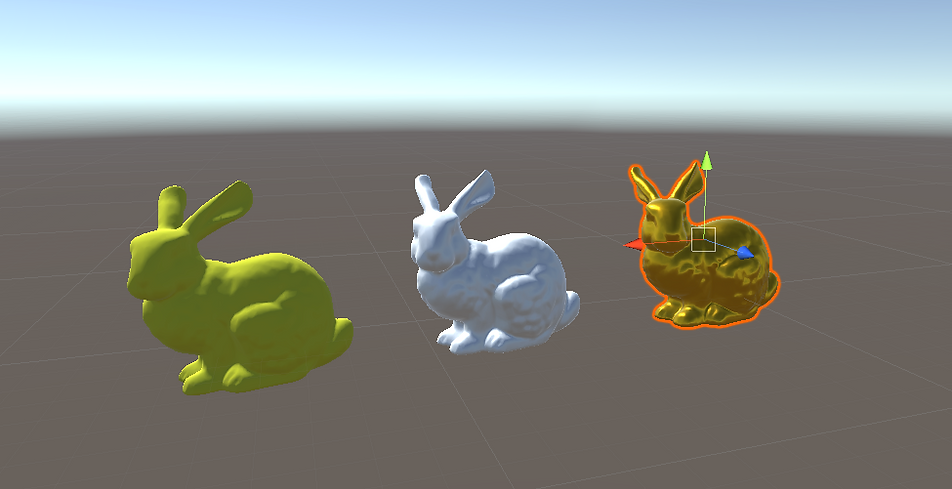
Materials could be added to an object by going to create and clicking on the Material option from the drop down. it is the last option. I have tried to create different materials for the object "Bunny" below.

We can use Colour, metallic and smoothness properties to create different shading. I have tried and recreated Unglazed Ceramic, Glazed Ceramic and Gold Materials below on the object.
We can also add textures in the albedo properties and then add a normal map which we can further use to control and intensity the effect as seen in the picture below. I have changed the albedo properties and added a normal map for the cube below, giving it a crumbled affect.

We can also add a lava effect by adding textures to the Emission option for the cube. We can also can change its intensity by changing colour of the Albedo and Emission

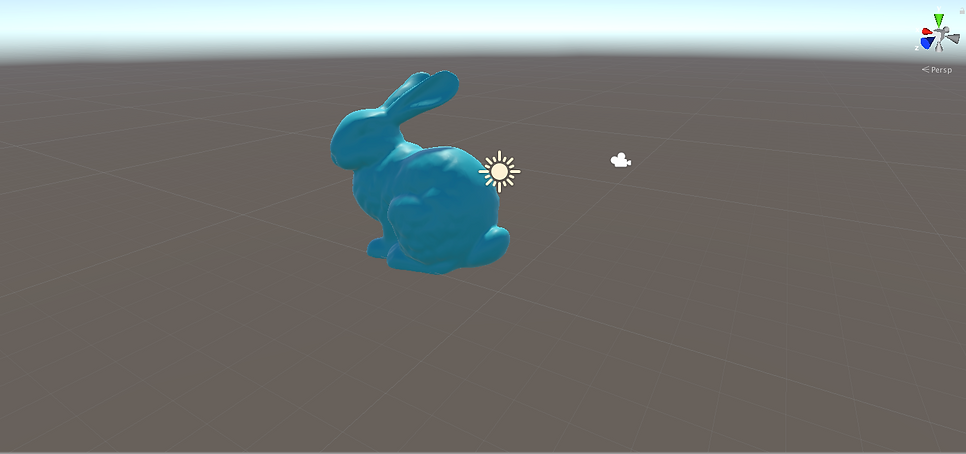
In the following image I have changed the bunny properties to Glass Bunny by mainly changing the rendering mode to Transparent. I changed the Albedo’s alpha to 0 and adjusted the metallic and smoothness properties so they match. I then added a glass texture to the normal map property

Some experiments I did playing with the properties, maps and textures to achieve different effects.


Particles
In order to create a new particle system we select the following options: GameObject/Effects/Particle System.

This gives us the following the Tab where we can control the further options in the particle system. This allows you to simulate the particles system in the Scene, without running the game.

Once we click on one of the options available in the particle system, it will give us a further drop down of options we can control. In the example below, I have clicked on the shape option which helps us manipulate the shape of the particle system, the angle radius Radius Thickness etc. it all gives us the option to control the Position Rotation and Scale which is very important.

Leaving the cursor on the module will give us the information about it e.g. below I left the cursor on

Interactive Island in Unity with a particle system (Bonfire min 2:06)
Interactive Island in Unity with a particle system (Bonfire min 2:06)
Particles
Importing Particle pack for unity can be done by going into the unity assist store and typing in the particle pack's name. Afterwards we press import to download it.

Sorting Layers
For the outing Layers Project, we were first asked to download the assist package with all the sprites. Then to orange them in the right order which is similar to the picture provided.

Once the arrangement of the sprites were done, we had to put the sprites in order to create the final image. this can be done bygone to the inspector view of each sprite and then giving it a value in the"order in layer" section.

After sorting all the sprites, below is the image I have been able to achieve.

Y Sorting
I also had a go on the Y sorting method (0,1,0) the involves making the sprites appear infront of the other. we go to edit and then project settings and then to the graphics section. We change the Transparency Sort Modde to Custom Axis and change the transparency sort Axis ourself. this is changed to 0,1,0.


Masking
For the masking, we have to create an additional comment known as the Sprite Mask. after the mask has been created need to add the sprite, in this case the bee sprite.

We can also change the mask interaction to Visible inside mask and Visible outside mask. this gives us options on how we want our sprite to react to it surroundings.


Camera and Chroma Keying
Camera and Chroma Keying
In the camera setting, we get an option to render scene without rendering the background. To do this we click on camera and select don't clear in the clear flags tab.

This will result in merging frames as the background will not clear the precious frames.


using the Cull technique where we can change the culling mask to nothing. this way the background camera will not render anything.

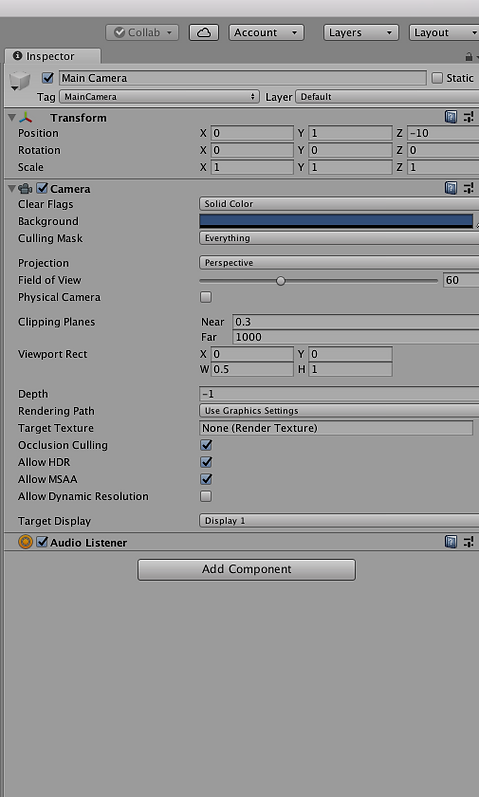
For the following image I have created two camera with duplicate setting. the different between them is the colour of the solid background and the change in the values of the view port. the Main camera the W has been set to 0.5 however for the duplicate camera the viewport setting has been set to W 0.5 and X 0.5

This resulted in the following Image:

Experimenting with the camera sorting and backgrounds


Underwater Environment
Underwater Environment

Lightweight rendering pipeline with Shadergraph
Lightweight rendering pipeline with Shadergraph
To use this we go to Window then click on the pack manager

Then we go to Packages and click on Advanced

Then we find and install Render-Pipelnes.Lightweight and click Install button.

After Installation the package has now appeared as Light weight RP and next to it will say up to date telling us the software is of the latest version.

Then next step is to install Shadergraph. we follow the same steps to get the shader graph, the it in the search bar and it will give us an option to install.

An up to date Shader Graph has been installed on the system.

Next step is to close down the packages window and Unity as well. we must now open unity again and make sure its 2018+ version. we also have to make sure that the template selected is LightWeight.

Unity has now opened the LightWeight Preview Project.

ShaderGraph: Unlit and Lit shaders
ShaderGraph: Unlit and Lit shaders
After opening a new Lightweight Template project, we create a new scene in Unity and add the Stanford-bunny.fbx to the project. we rescale the bunny to 0.01

We now create a new material and call it MyMat. This new material by default will be using the LightWeightRP/Lit shader properties.

Now to create a shader we go to Assets/create/shader/unlit graph. we name the shader as "Myfirstshader"


To open the Shader Editor, we click on the new share and select open Shader Editor option.

We create a new Node and look for colour. We change the colour to red and extend it to the shader colour.

Now we save assets to update all the changes.

We can apply this shader to MyMat material now, to do this we go and click on MyMat, click on the shader option (LightWeight Render Pipeline/Lit) select Shader Graphs from the Drop down and click on Myfirstshader. this will turn the MyMat material to Red that we selected in the Shader Editor.


We put the martial to our bunny but it only turns red with no shading features such as light and shading. to achieve that we will create a Lit shader.

To create a lit shader we go to Assets/create/shader/PBR graph. we name the shader as "Mysecondshader"

To open the Shader Editor, we click on the new share and select open Shader Editor option again. This gives us a new type of Shader Editor.

Now we follow the same steps as we did for the Unlit shader to create a blue colour and pass it into the Albedo parameter. We then press save assets.

We can apply the new Lit shader to MyMat material, to do this we go and click on MyMat, click on the shader option (LightWeight Render Pipeline/Lit) select Shader Graphs from the Drop down and click on MySecondshader. this will turn the MyMat material to Blue that we selected in the Shader Editor plus this time it will react to the light


ShaderGraph: Basic node manipulation
ShaderGraph: Basic node manipulation
For this task we create a new project again with LightWeight RP.

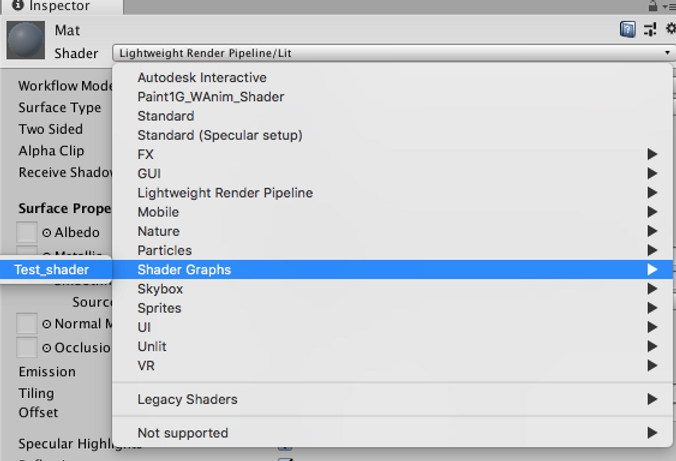
Next we import the Sanford_bunny into the scene. we then create a new material call it mat and a new PBR Graph calling it Test_shader

Next we select the test shader click on open shader editor, create a new node, select colour and change it to orange, we then connect this node to albedo.

Then we add the new shader to the mat, and apply it to the bunny.
Clicking at the bunny in the project shows us that there are no properties like colour or texture.

Next we go the shader editor, Right click on the colour, convert it to property. we can change the name to our liking by double clicking on the initial one. changed it to Mycolor

Now going to the scene and clicking on the bunny, we can see the exposed colour property.

We can change the colour of the bunny by clicking on the inspector. in this case I chose Green.

Now we can add transparency to the bunny. To do this we go to the Shader Editor and click on the little cog icon and select “surface/transparent”.

Next we create a new node in the shader editor and look for Slider. then we connect this slider to Alpha.

We then right click on the slider and cage it to property. renaming the new vector to Transparency and changing the default value to one so that the shader is visible.


We can now adjust the Transparency in the Mat material section when we select the bunny in the project.

We are now going to delete the transparency from shader editor, the property and the slider.


Next step is to create a new node called split and connect it with property (myColour) and Alpha.

Going to the scene and selecting the bunny, we can now control the transparency from the colour property.


ShaderGraph: Mixing colours
We create a new material call it mat. we create a new PBR graph call it test shader. then we open up the editor and create two nodes fo colour and convert them to properties. after doing so we create another node called add. we pass both colour nodes from add and connect the output to PBR master albedo and save assets.

Next we go to the scene and apply the material to the bunny. we click on bunny and in the mat properties add test shader. this will give us an option to mix colours as we created two colour nodes. in this case I chose red and green and the resulting colour was yellow.


Next we go to the shader editor ,delete the add node and replace it with he multiply node. we do the same now which is connect colour 1 and 2 to the multiply and connect the resulting node to PBR master albedo.
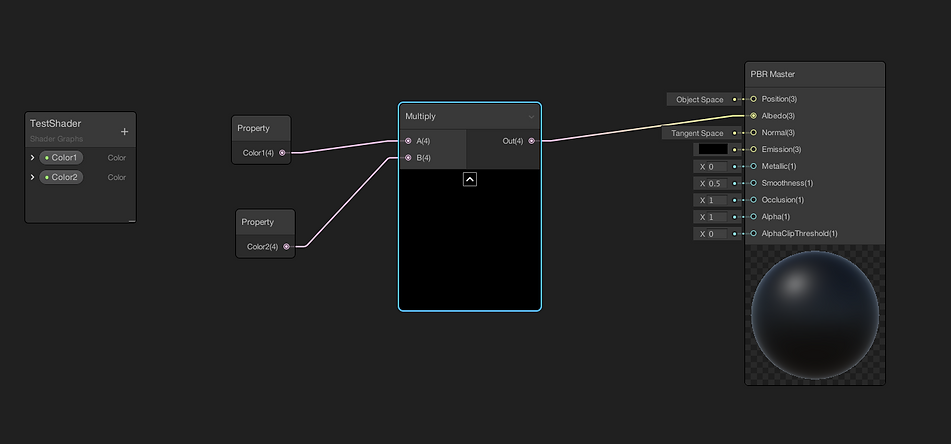
Next we go to the scene and apply the material to the bunny. we click on bunny and in the mat properties add test shader. this time it will show us multiplication which will be black with shading


The darker colour will always dominate but we can always change how dark or bright the resulting colour is .e.g:
Red+White


Red+Grey


Red+Black


There are other ways of mixing colour .e.g.
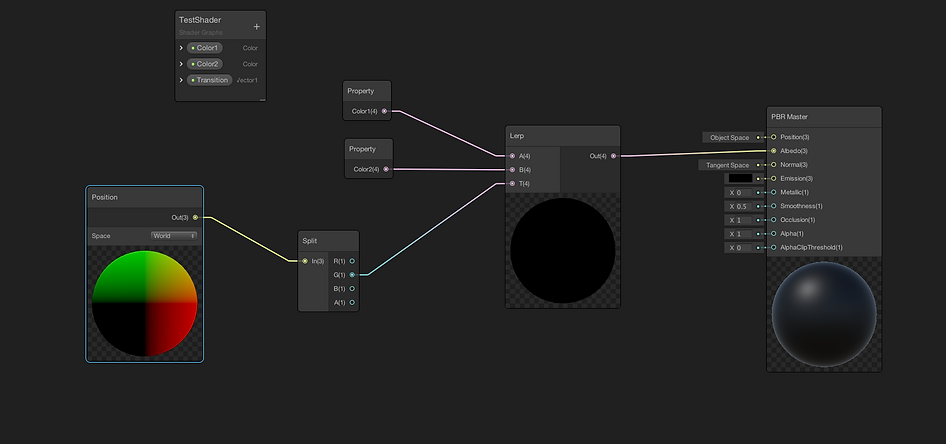
We go to the shader editor and delete the multiply node and replace it with the lerp node. Then we connect the two colours to the leap and add another node called slider. We convert slider to property and change its name to transition as it will be the value that will control the number of other colours. Now we connect that to the third slider node in the lerp. and finally connect the output to Albedo in the PBR master.

Following Pics show the use of Transition (slider) to mix colours:


Next we go to the Shader editor and there we add two new nodes, Position and split. We connect the position node to the split node and pass the G from Split to the transition in Lerp and of course final output going to Albedo PBR master.
Lets see the results of the the shader below:


As the slider node(transition) has no more effect we can delete it from the shader editor.


Now moving the bunny along the Y axis will result in colour change accordingly as it is set as world in the position node in the shader editor. if we change the position space to object, it will maintain the selected colour.


ShaderGraph: Texturing
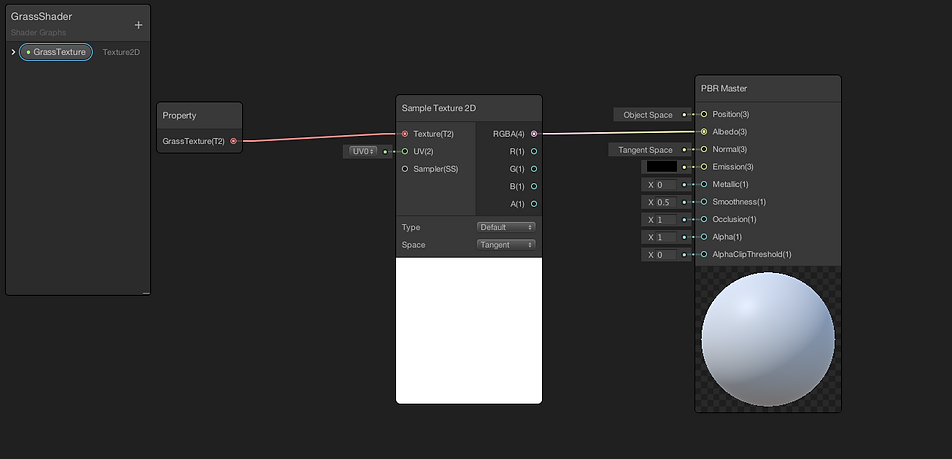
For this part, we create a new scene in unity with LightWeight PR. We then create a new material and call it mat. We also create a new PBR Shader and call it GrassTexture. we then open the Shader Editor and create two new nodes namely, Texture 2D Asset and Sample Texture 2D. we pass the texture 2d asset to Sample texture 2d. From Sample 2d texture we pass the RGBA to Albedo in PBR master. we convert the Texture 2D Assets to property and rename it to Grasstexture and finally save assets.
Next we go in to the material and add the grass texture.

As the Grass FBX is only visible from one angle we got to the shader editor and Pass the A channel into the Alpha channel from Sample texture 2D to PBR master. We also click on the little cog icon in PBR and change surface type to Transparent and finally Select “Two Sided” to ticked.

This results in the following change to Grass.fbx


The next step we go back to the shader editor and add two new nodes, Colour and multiply. Now we do the connection as shown in the picture below. this will allow us to multiply the texture by a colour of our choice.


Next we go back to the editor and create two more nodes Multiply and Slider. We convert slider to property and change its name to Emission. this will allow us more control over the appearance of the shader we do the following connection in the shader editor to achieve the desired effect.


Next thing we will be working with is UV. we go back to the shader editor and create three new nodes, UV, Split and Combine and connect them in the following manner.

Next we add two more nodes, Time and add and connect them the following way. then we save assets and go back to the scene. this has made the grass move along the X axis. If we change the connection from time to Sine Time, it will make the texture move back and forward between the two points.


Now we a multiply node in the Shader and multiply Time node by 0.2, so that the effect is not so strong. My shader is looking like this so far.

Next we add 3 more nodes, Another UV, Lerp and Slider. we then pass the G channel from split tor the T channel of Lerp. the shader looks something like below.

Next we add the One mInus node to reverse the affect which was from top to bottom on the Grass.fbx, now its bottom to top.

Next I have added A slider node and converted it to the property and naming it WindStrenght. I did the connection as following which gives me control over the wind strenght using the slider in the project.


I duplicated the grass to get it a more realistic effect and as it is a duplicate, the shader effects will be the same.


Below is an image of my Final Shader

Unity: Graphical Optimisation
Unity: Graphical Optimisation
For this task we create a new project and create a 3d plane. Next we create a new material and add the provided checkered texture to the plane.

We then click on the texture and under Emissions tab change the Tiling toX 5 Y 5. afterwards we click on the checkered floor texture and click on advanced in the inspector then untick Generate Mip Maps.


This gives us the following result.

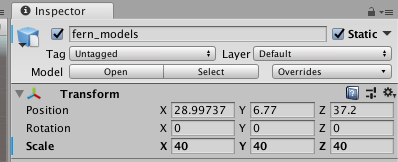
Next step is to create a new material and name it fern. then we import the fern_models in to the project. we then click on the fern material and apply the fern_img to it and change the rendering mode to fade. Then we change the colour to dark green and apply the material to the fern_models.


Different between different sizes (resolutions):
32x32

64x64

128x128

256x256

Next we add two spot lights in the scene, Green and Red. then we go to the plane inspector and change it to static. We do the same for Fern_modles.


Now we go to Window/Rendering/Light explorer and there we change all the lights mode to Baked.Next we go to Window Rendering/light setting scroll all the way down and click on generate lighting.


Image after Rendering:

Unity: GraphicalOptimisation
Using the given models and textures, I have been able to create the Bamboo leaves and trees models.

Next we create an empty game object and name it Tree.
Then we parent both bamboo models to the tree object.

Then we add LOD group Component to the tree object.

In LOD 0 we add Full Bamboo model and in LOD 1 we add Simple Bamboo


Unity – Basic Programming in C# - Variables and functions
We start the new project in unity and create a cube. after that we click create under project tab and create a new C script. we drag this clip onto our Cube which shows us the script in the inspector.

Next we click on Simpleoutput script under project window and once the inspector loads we click on open. This will open the script in MonoDevelop. I have edited the script as follows.

Afterwards we go back to Unity after having the script. we load the console by clicking on Window/General/Console. after that we click on play button and get something as follows:

Next I went to the Simpleoutput script editor and changed the script as shown below.

This resulted in the following change in the console.

Unity – Basic Programming in C#
– Random numbers / Colour
For this task I created a new Unity project, created a 3d cube and assigned it a script C. then I went into the visual studio and did the following:

Coming back to unity after saving the script I ran it a few times using the play button and got the following random results in the console.

For the next part of generating random colours, I tried using the given code as follows but it gave me an error when I tried to run the project in Unity.


I tried only the first command to change the cube colour to red and it was a success.


Unity – Basic Programming in C#
– Input/ Movement


The following script gave me an option to move not only on the X axis but Y axis as well.

In the following script, making it Public gave me access to the speed of the object in Unity

