For week one we have worked on creating a tentacle and giving it an expression. This involves all the steps included below
First we create a Cube and turn the attributes to make it turn into a long tower like structure. Then we select W on the keyboard and press Insert to bring p the pivot control. then we press shift+V to make the pivot stick right in the center. Finally we freeze transformation.
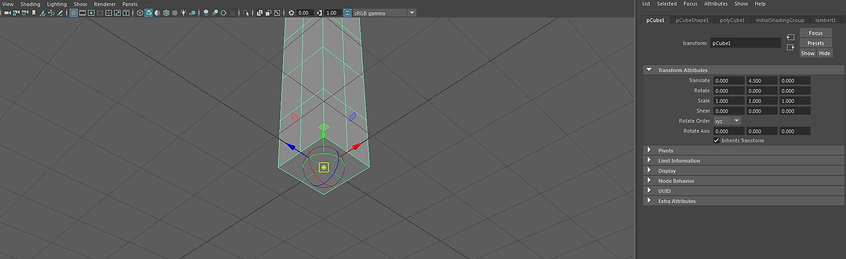
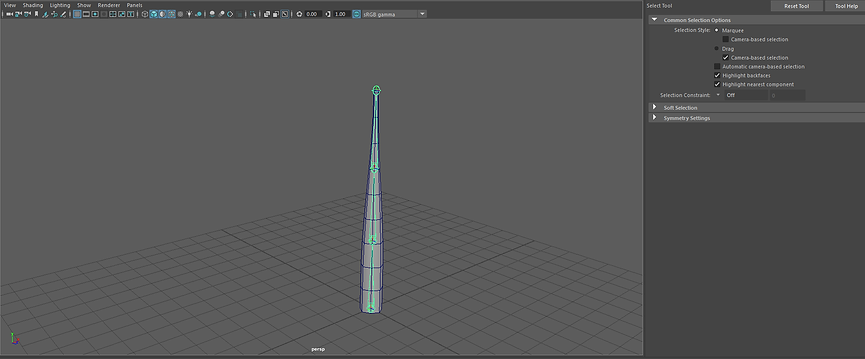
Next up we got the the bottom view and select the corner and holding Shift on the keyboard. then we press R to get the scale tool and use the yellow one to create a rounded shaped structure. we can also press 2 to get a more smoother surface.

After this step we create 4 joints by going to rigging-skeleton-create joints. We need to hold X in order to get the attached joints. we can change the size of the joint by going to animation joint scale.
Next up we select the joints and Shift select the object. Then we click on Skin and go to Bind skin-reset setting-Bind Skin. This binds the joints with he skin.

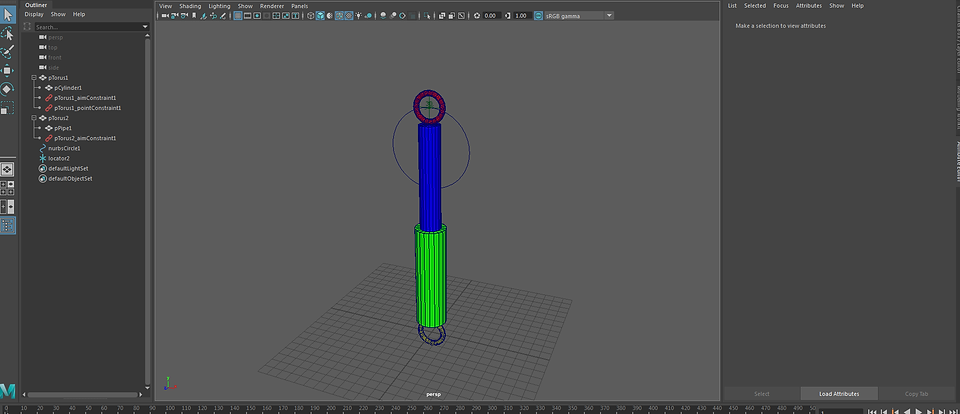
Afterwards we create three NURBS circles and change their sizes and also name them. then we connect each NURBS to the joints we have created earlier.
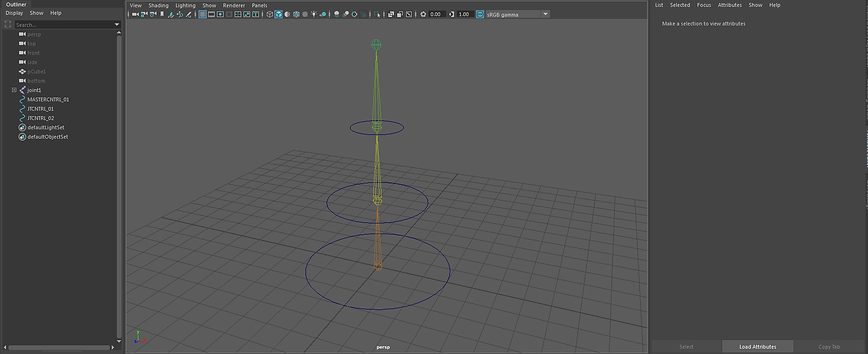
Next up we join the Joint Control and the Joints we created. this will be done by selecting the two and going to constrain-Orient. we repeat this step for the above joint controls as well. then we need to parent the remaining joints. this gave me the following control over the object.

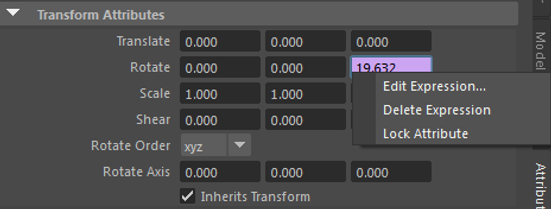
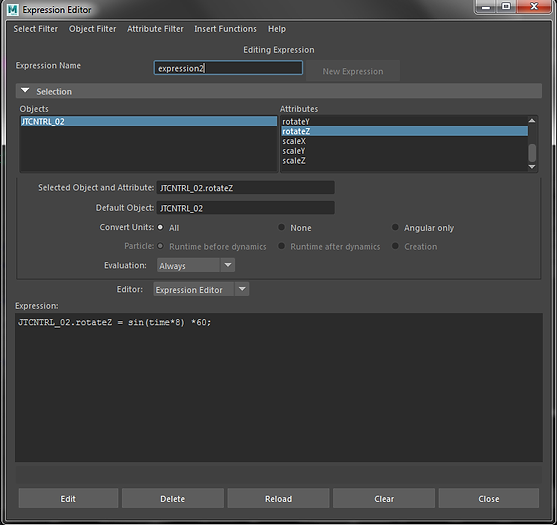
Now we have to add expression to the tentacle. this can be done by going to the joint control we created earlier and right clicking on the Transform attribute-Rotate and then selecting Edit expression. this will give us following window to edit
I have been able to achieve the following using all the tricks used above:
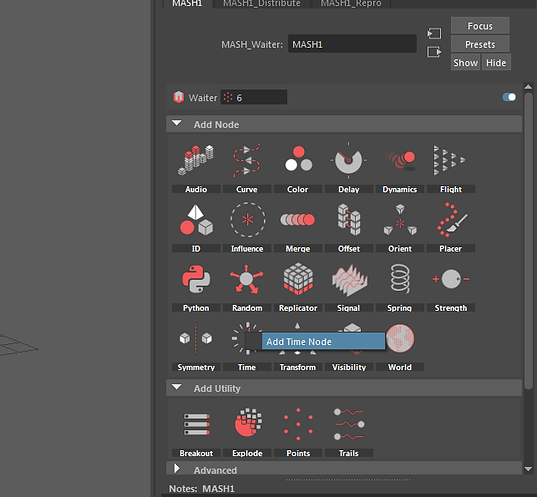
Next step is to use the MASH and create duplicates of our tentacle.

We can now change the number of points that will give us the number of tentacles. we can also choose the distribution type but we have to connect it with another object in this case we used a sphere.
Next we add a time node to the Object.
After adding a time node we grouped the sphere and the tentacles and created another MASH.
Next we added a random mode to gave the animation random movements and a signal node to move around the tentacle monsters.
This weeks lesson focuses on joint creation. First we need to make sure the Z Axis on all joints are facing the same way. If not we can amend this by selecting the joint and going to Skeleton-Orient Joint. There we need to change the Positive to Negative and hit Apply. This will give us the following result.
Next up we were provided with a robot model for which we had to create a joint Skeleton. the technique we used was creating joints along the x Axis as it wouldn't give us trouble with the Z axis. Then we adjusted the joints to the Robots arm using the V snap point and precise adjustment in the attribute editor by holding down CTRL.


Then we swapped the Transform Attributes rotate values with the Joint Orient values as can be seen above. These steps were repeated to get a skeleton made for the robot using the joints. This has been demonstrated in the picture below.

We then parented the Mesh with all the joints created. This is demonstrated in the video below.
Next I worked on the Tech Animation which involves setting keys and then finally using the two panes stacked. Following all the steps, got the following video.
Below I added more animation and a camera control with locator. Then I added some animation on the camera as well.


Next we worked on the render set up. I created a sphere and changed the properties the subdivision axis and subdivision height to 80 and translate to 1

Then I put the pivot point at the bottom of the sphere and by selecting vertex mode and the soft selection by pressing B on keyboard I resize. afterwards I get rid of the top half of the sphere.


Next I expanded this cut sphere around the robot character to make it a background for him. and then to invert the mesh of the sphere I went to Mesh Display and selected the Reverse command.

For this week lesson, we focused on Skinning techniques. This is done by starting with basic skeleton in Maya. We have been provided with a ARM mesh in Maya. We then created a joint skeleton for this Arm. As we can see we created a joint skeleton system for thumb and fingers as well.

Next step is to bind the Skin of the arm to the joint skeleton we created. This will be done by selecting and joint system and the Skin by holding shift and by going to BIND SKIN under Skin in RIGGING.
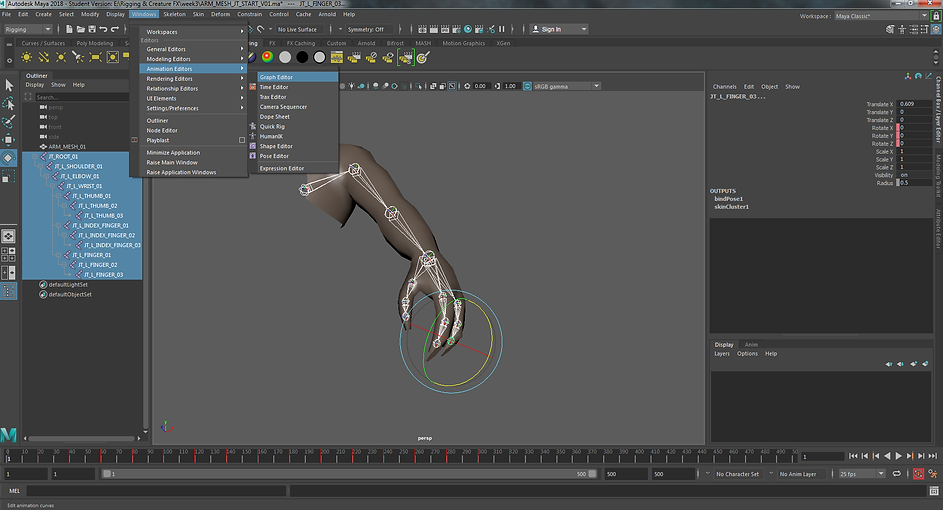
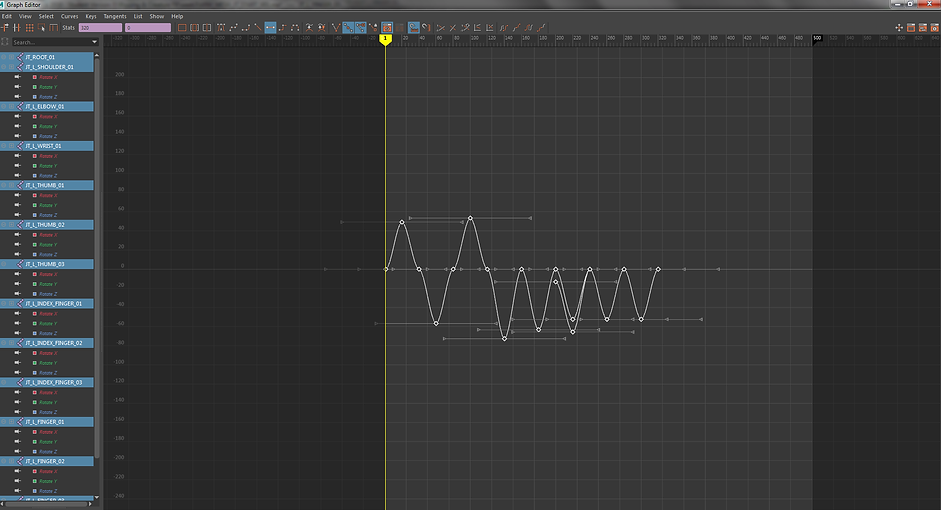
After binding the SKIN to the joint system Skeleton, we Animated the arm and the thumbs and then used the Dope sheet to help further with the animation.


Then we go to the Animation Editor again and this time we select Graph Editor.
Next up is the technique to use paint weights. To access this we need to go to the Paint Skin Weights tools by right clicking on the object. next we go to the tools and select flood after selecting the JT_Root. and then lock all the rest of the Joints except the Root and the Shoulder joint.

Next up we right click and select Grow selection then Grow. This needs to be done in the vertex mode. After doing this we can keep pressing grow until we reach the full arm length. After doing that we change the replace to paint in the tools of paint weights and press Flood again.
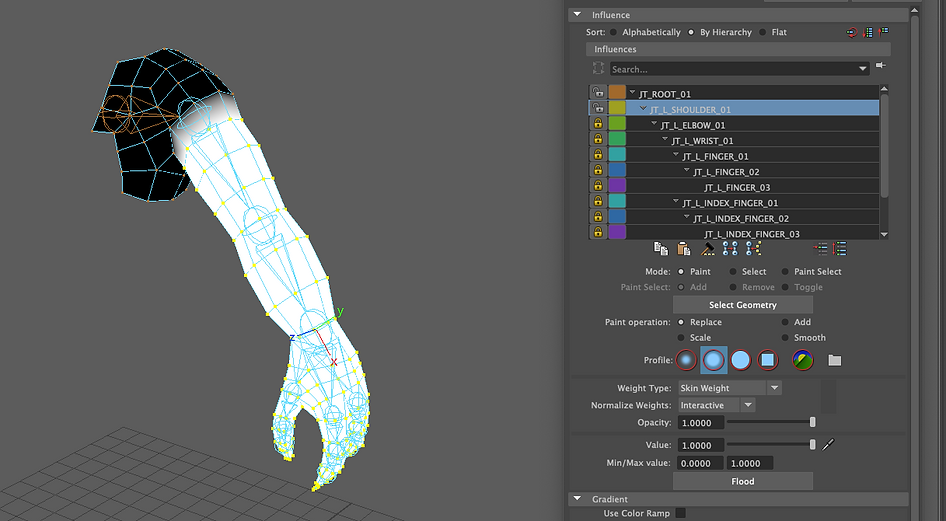
After this we select the upper portion of the arm and manually select the vertexes. Inorder to the we first need to go to mode and change it to select. after the selection of the vertexes has been done we select the paint option in the tools. and in paint operation select Smooth and click flood.


Next up, we lock the JT Root and select unlock the Elbow. We keep the Elbow unlocked. After doing so we select the Vertex again and go to the Grow Selection option and grow unto the elbow of he Arm Rig. After having done so we go to the Tools again and select Mode:paint and Paint Operation Replace and click Flood.

Next up in order to do further smoothing to therm rig we ue the Smooth Brush on the arms on the areas that appear to be rough and edgy.
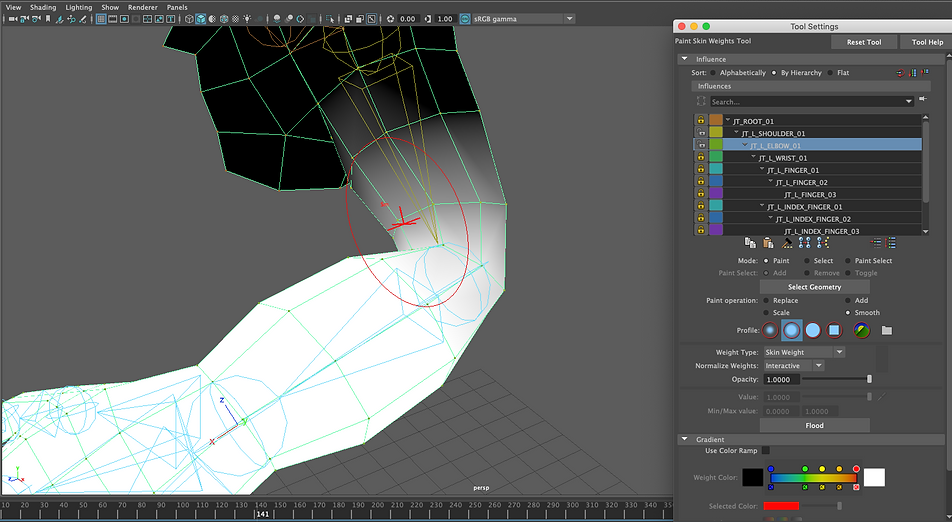

Next up we follow the same procedure with the hand. This will include the Elbow wrist and then Selecting the vertex. Net up we change the mode to paint and paint operation to replace and click flood.

Rigging Controls Robot

Smiley Face Using MASH in Maya


Assessment 2: MASH on MOCAP
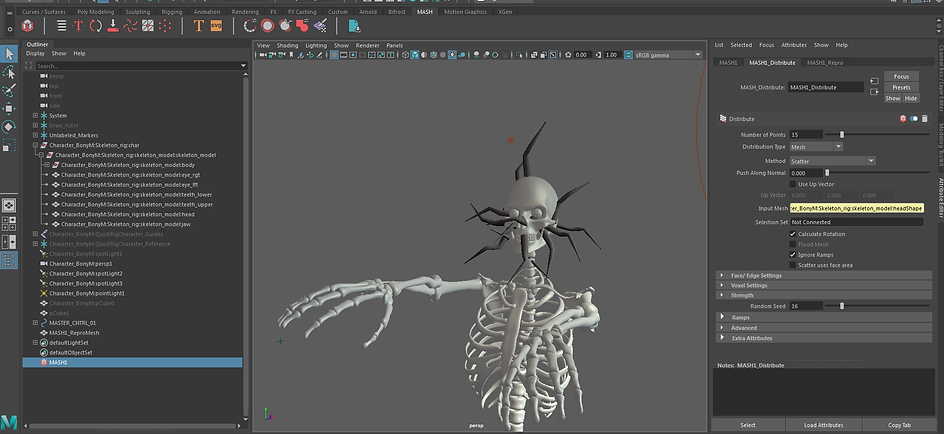
I have chosen to demonstrate the Mash network controls on the MO CAP. I have followed the Mash process in Maya which is laid out below.
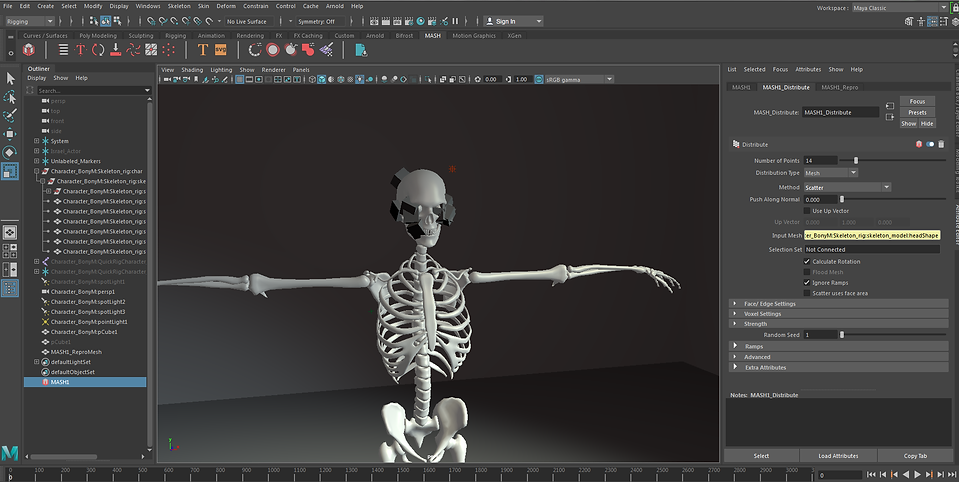
I have attached the cubes using the Mash network to the face of the Skeleton. This is the Mocap.

Modeled a tentacle

Then I created and Binded joints
Using the Mash Ive put the tentacles on the skeleton
I created a zombie infected with Parasites Walking around. The Mocap from performance animation was used for this together with the Rigging and creature techniques.